Treasure Hunt Quest ▪ Goat Business Quest ▪ Piglet Trouble Quest ▪ Slime Defender Quest ▪ Funky Hair Quest ▪ Eddy's Quest ▪ Cave Research Quest
Rare Berries Quest ▪ Rat Problems Quest ▪ Sheep Protector Quest ▪ Peasant Courier Quest ▪ Boots For Dinner Quest ▪ Snake Antidote Quest
Special Hairdye Quest ▪ Candy's Potion Quest ▪ Bird Control Quest ▪ Claw Necklaces Quest ▪ Karma Quest ▪ Aeven Sewers Quest ▪ Ayla's Witch Quest
Cactus Holiday Quest ▪ Sky Wonder Rescue Quest ▪ Peri Peri Quest ▪ A Guard's Life Quest ▪ Susan's Quest ▪ Factory Panic Quest ▪ Summoner Quest
Pjedro's Son Quest ▪ Monkey Island Quest ▪ Pirate Quest ▪ Truth Quest ▪ Ancient Wraith Quest
Treasure Hunt Quest - terminal
Begins in Tutorial Town.
Talk to Danny to start the quest.
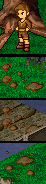
Find the first treasure - it's found by using the top exit of the Town map, then the left exit of the next map. Cross the bridge and step on the dirt patch at the end of the waterfall.
By heading back to talk to Danny, he'll tell you the next clue to where the treasure is. I'll save you from going back and forth.
Otherwise just head on over to the second treasure.
Find the second treasure - use the right exit out of that map and follow the path across, use the right exit to enter the next map with the Ship. Follow down the bridge along side the Ship and step on the dirt patch.
Find the last treasure - head back to the Town and use the bottom exit to the map with the Blobs. Walk down the map until you find a shovel, step on the dirt patch near it. Return to Danny.
Reward - 1,200 exp and 10 Small Health Potions.
Even though it says you are rewarded with 5 Small Health Potions in the System chat tab, it's glitched.
The quests on Tutorial Island have a couple little glitches. You may have to re-log to show the correct amount of items in your Inventory.
Talk to Danny to start the quest.
Find the first treasure - it's found by using the top exit of the Town map, then the left exit of the next map. Cross the bridge and step on the dirt patch at the end of the waterfall.
By heading back to talk to Danny, he'll tell you the next clue to where the treasure is. I'll save you from going back and forth.
Otherwise just head on over to the second treasure.
Find the second treasure - use the right exit out of that map and follow the path across, use the right exit to enter the next map with the Ship. Follow down the bridge along side the Ship and step on the dirt patch.
Find the last treasure - head back to the Town and use the bottom exit to the map with the Blobs. Walk down the map until you find a shovel, step on the dirt patch near it. Return to Danny.
Reward - 1,200 exp and 10 Small Health Potions.
Even though it says you are rewarded with 5 Small Health Potions in the System chat tab, it's glitched.
The quests on Tutorial Island have a couple little glitches. You may have to re-log to show the correct amount of items in your Inventory.

Goat Business Quest - terminal

Begins in Tutorial Town.
Talk to the Collector to start the quest.
Collect 6 Goat Horns - dropped from Goats throughout Tutorial Island, return to the Collector.
Reward - 300 exp and a Small Health Potion.
Even though it says on the System chat tab you are rewarded with 500 exp and 2 Small Health Potions, it's another glitch.
When I completed the quest, my Performance showed that my last kill was 300 exp, and in my Inventory I only got one Small Health Potion, even re-logging didn't give me that extra one, so it's a fault in the text. I did the quest twice on different characters just to double check.
You can check your Performance by clicking the E icon up the top left of the screen, next to your Quest progress.
Piglet Trouble Quest - terminal

Begins in Tutorial Town.
Talk to the Adventurer to start the quest.
Kill 10 Piggies - he says kill 5 in the dialogue but it's glitched, return to the Adventurer.
It's a good idea to keep a Piggy that drops if you haven't yet completed Eddy's Quest.
Reward - 100 exp and 25 gold.
Talk to the Adventurer to start the quest.
Kill 10 Piggies - he says kill 5 in the dialogue but it's glitched, return to the Adventurer.
It's a good idea to keep a Piggy that drops if you haven't yet completed Eddy's Quest.
Reward - 100 exp and 25 gold.

Slime Defender Quest - terminal
Begins on the Blob map, on Tutorial Island.
Talk to the Defender to start the quest.
Kill 25 Blobs - return to the Defender.
Reward - 1,000 exp and 5 Small Health Potions.
It'll be a good idea to keep any Blob Slimes that drop if you're wanting to complete the Truth Quest on mainland, you'll be needing Blob Slimes.
Talk to the Defender to start the quest.
Kill 25 Blobs - return to the Defender.
Reward - 1,000 exp and 5 Small Health Potions.
It'll be a good idea to keep any Blob Slimes that drop if you're wanting to complete the Truth Quest on mainland, you'll be needing Blob Slimes.
Funky Hair Quest - terminal
Begins in the Tutorial Store, in Tutorial Town.
Talk to the Funky Hair Dude to start the quest.
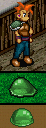
Collect 3 Blob Slimes - dropped from Blobs one map down from Tutorial Town, return to the Funky Hair Dude.
Reward - 800 exp and 100 gold.
When collecting the Blob Slimes, in the quest progress it tells you to collect 5 Blob Slimes but you only need 3.
Once you have collected 3 Blob Slimes, your System chat tab will show you have collected 10 Blob Slimes, it's just a glitch.
Talk to the Funky Hair Dude to start the quest.
Collect 3 Blob Slimes - dropped from Blobs one map down from Tutorial Town, return to the Funky Hair Dude.
Reward - 800 exp and 100 gold.
When collecting the Blob Slimes, in the quest progress it tells you to collect 5 Blob Slimes but you only need 3.
Once you have collected 3 Blob Slimes, your System chat tab will show you have collected 10 Blob Slimes, it's just a glitch.

Eddy's Quest - terminal

Begins in the house next to the Ship, on Tutorial Island.
Talk to Eddy to start the quest.
Give Eddy a Piggy - dropped from the Piggies, near the well on the first map.
Reward - 400 exp and 5 Small Health Potions.
When you collect a Piggy it will show you have collected 10 Blob Slimes on the System chat tab, just like the Funky Hair Dude's quest. It's just a glitch.

Cave Research Quest - terminal

Begins outside the Bat Cave, one map up from Tutorial Town.
Talk to the Cave Researcher to start the quest.
Collect 5 Bat Wings - dropped from the Bats inside the Cave, return to the Cave Researcher.
Reward - 1,400 exp and 100 gold.
The Bat Wings have a low drop rate so they may take a while to drop.
Talk to the Cave Researcher to start the quest.
Collect 5 Bat Wings - dropped from the Bats inside the Cave, return to the Cave Researcher.
Reward - 1,400 exp and 100 gold.
The Bat Wings have a low drop rate so they may take a while to drop.
Rare Berries Quest - terminal

Begins in the Sheep field, one map left after arriving onto the Mainland through the Ship.
Talk to Old Farmer Greg to start the quest.
Collect 10 Rare Berries - a Rare Berry spawns within the plants in the soil, walk towards the plants and click on them, right clicking on Rare Berries to collect them. There may also spawn Useless Leaves within the plant, you can collect these too, to increase the chance of a Rare Berry spawning back. Return to Old Farmer Greg.
Reward - 1,500 exp and 500 gold.
When collecting the Rare Berries, in the quest progress it tells you to collect 20 Rare Berries but you only need 10.
Also, just like the Useless Leaves say, they are useless, so if you have collected any you aren't able to sell them later on because they are lore.
Rat Problems Quest - terminal

Begins in the Farmer House, the building next to the Wanderer's spawn place.
Talk to Old Farmer Jorge to start the quest.
Kill the Rat - he is wandering around inside the house, return to Old Farmer Jorge.
He will now tell you there are rats in his basement, enter down the stairs in the house.
Kill 20 Fierce Rats - return to Old Farmer Jorge.
Reward - 1710 exp.
While you are killing the 20 Fierce Rats, make sure not to talk to Old Farmer Jorge upstairs, talking to him during this part of the quest will cause it to abort and you will need to repeat the quest from the beginning.
If you are in need of healing, the well outside of the house spawns Health Potions that you can collect and use.

Sheep Protector Quest - repeatable

Begins in the field south to Aeven's entrance, on the map of the Farmer House.
Talk to Old Farmer Jerzy to start the quest.
Kill 5 Snakes - return to Old Farmer Jerzy.
Reward - 170 exp.
Talk to Old Farmer Jerzy to start the quest.
Kill 5 Snakes - return to Old Farmer Jerzy.
Reward - 170 exp.
Peasant Courier Quest - repeatable

Begins in the Southern Woodlands, one map left of Old Farmer Jerzy.
Talk to the Peasant Woman to start the quest.
Bring the Peasant Bread to Old Farmer Jorge - return to the Peasant Woman.
Reward - 180 exp.
Talk to the Peasant Woman to start the quest.
Bring the Peasant Bread to Old Farmer Jorge - return to the Peasant Woman.
Reward - 180 exp.
Boots For Dinner Quest - terminal

Begins in the field south to Aeven's entrance, on the map of the Farmer House.
Talk to the Aeven Captain to start the quest.
Find the Captain's Boots - dropped from Sheep, return to the Aeven Captain.
Reward - 2,000 exp and 4 Small Health Potions.
Talk to the Aeven Captain to start the quest.
Find the Captain's Boots - dropped from Sheep, return to the Aeven Captain.
Reward - 2,000 exp and 4 Small Health Potions.
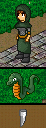
Snake Antidote Quest - terminal

Begins at the south entrance of Aeven.
Talk to Steve to start the quest.
Collect 10 Snake Rattles - dropped from Snakes, return to Steve.
Reward - 900 exp.
Talk to Steve to start the quest.
Collect 10 Snake Rattles - dropped from Snakes, return to Steve.
Reward - 900 exp.
Special Hairdye Quest - repeatable

Begins in Aeven Town Square.
Talk to Hactor to start the quest.
Bring the Special Hairdye to Babs - she is inside Bab's Hair Care in Aeven.
Reward - 200 exp.
Talk to Hactor to start the quest.
Bring the Special Hairdye to Babs - she is inside Bab's Hair Care in Aeven.
Reward - 200 exp.
Candy's Potion Quest - terminal
Begins in Aeven Town Square.
Talk to Candy to start the quest.
Collect 5 Snake Teeth - dropped from Snakes south of Aeven, return to Candy.
Reward - 1,100 exp.
Talk to Candy to start the quest.
Collect 5 Snake Teeth - dropped from Snakes south of Aeven, return to Candy.
Reward - 1,100 exp.
Bird Control Quest - repeatable

Begins in Aeven Town Square.
Talk to Jacob to start the quest.
Kill 10 Crows in Aeven - return to Jacob.
Reward - 300 exp and 50 gold.
Talk to Jacob to start the quest.
Kill 10 Crows in Aeven - return to Jacob.
Reward - 300 exp and 50 gold.
Claw Necklaces Quest - terminal
Begins in Aeven Town Square.
Talk to Dan to start the quest.
Collect 12 Crow Claws - dropped from Crows in Aeven, return to Dan.
Reward - Crowclaw Necklace, 920 exp and 120 gold.
If you're finding it difficult to collect Crow Claws in Aeven you can head over to the Aeven Temple, there are quite a few that spawn there.
Talk to Dan to start the quest.
Collect 12 Crow Claws - dropped from Crows in Aeven, return to Dan.
Reward - Crowclaw Necklace, 920 exp and 120 gold.
If you're finding it difficult to collect Crow Claws in Aeven you can head over to the Aeven Temple, there are quite a few that spawn there.

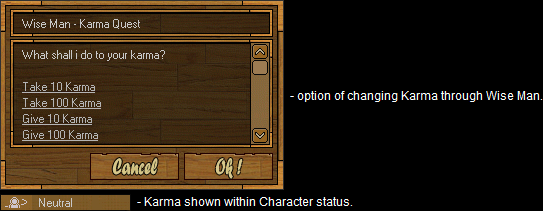
Karma Quest - repeatable

Begins in Aeven Town Square.
Talk to Wise Man to start the quest.
To be honest, this quest doesn't do much other than show you how to change your Karma, which again doesn't do anything in-game.
You have the choice of taking or giving Karma, this changes the status of your Karma from Neutral to either bad or good, depending on give or take.
Reward - change of Karma status.
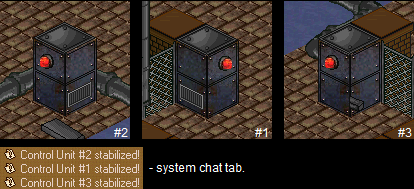
Aeven Sewers Quest - terminal

Begins in Aeven Pub.
Talk to the Drunk to start the quest.
Power off Control Unit #2 - make your way down to the Aeven Sewers using either four of the stairs in the corners of Aeven. Once inside the Sewers, you need to get to the centre where there are Mummies and streams of water, there's several paths to get to the centre, it helps if you use the map. You'll see stairs within the middle with the Control Units surrounding the stairs, stand in front of the red flashing light of Control Unit #2.
Power off Control Unit #1 - stand in front of the red flashing light of Control Unit #1.
Power off Control Unit #3 - stand in front of the red flashing light of Control Unit #1, return to Drunk.
Reward - 6,100 exp and a Big Fairysoda.
Ayla's Witch Quest - repeatable

Begins in the Witch's house, in Aeven.
Talk to Ayla to start the quest.
Kill 20 Rats - return to Ayla.
Kill 20 Sheep - return to Ayla.
Bring Ayla a Terror Potion - bought from Hitaru in the Illusion Shop, Estaq Stronghold, its price is 40 gold.
Reward - 800 exp.
Giving Ayla a Love Potion instead will reward you with only 300 exp.
Love Potions are also bought from Hitaru, their price are 8 gold.
Cactus Holiday Quest - repeatable

Begins in Limbo Desert.
Talk to the Limbo Sailor to start the quest.
Kill 10 Cactusaurs - return to the Limbo Sailor.
Reward - 500 exp and 75 gold.
After killing 10 Cactusaurs, in the System Tab it will tell you that you have earned 170 exp, but it is just an error.
Talk to the Limbo Sailor to start the quest.
Kill 10 Cactusaurs - return to the Limbo Sailor.
Reward - 500 exp and 75 gold.
After killing 10 Cactusaurs, in the System Tab it will tell you that you have earned 170 exp, but it is just an error.
Sky Wonder Rescue Quest - repeatable

Begins in the Sky House, in Sky Wonder.
Talk to Jessica to start the quest.
Talk to the Wolf Leader - east from Estaq Stronghold.
Collect 10 Bird Feathers - return to the Wolf Leader.
Talk to Jessica.
Kill 40 Foxes - outside of the Sky House.
Return to Jessica.
Reward - 500 exp and 100 gold.
The Bird Feathers are dropped from all types of Birdmen on the same map as the Wolfmen.
Sometimes they are a little hard to be seen on the ground since they blend in, you can use the System chat tab as help to see if one has dropped.
Peri Peri Quest - repeatable

Begins in the Mole Farm House, east from Aeven's exit.
Talk to the Peri Peri Farmer to start the quest.
Kill 50 Moles - return to Peri Peri Farmer.
Reward - 2,000 exp.
Since Moles only give 3 exp, it isn't really worth repeating this quest just for the reward.
Talk to the Peri Peri Farmer to start the quest.
Kill 50 Moles - return to Peri Peri Farmer.
Reward - 2,000 exp.
Since Moles only give 3 exp, it isn't really worth repeating this quest just for the reward.
A Guard's Life Quest - repeatable
Begins in the Swamp, near the entrance to the Death Cave.
Talk to the Guard to start the quest.
Kill 20 Spiders - return to the Guard. Also keep the Spider Legs that drop, you'll be needing them in the next bit.
Collect 10 Spider Legs - return to the Guard.
Talk to the Elite Captain - he's in the Red Arena, in the Castle.
Reward - 450 exp and 400 gold.
Talk to the Guard to start the quest.
Kill 20 Spiders - return to the Guard. Also keep the Spider Legs that drop, you'll be needing them in the next bit.
Collect 10 Spider Legs - return to the Guard.
Talk to the Elite Captain - he's in the Red Arena, in the Castle.
Reward - 450 exp and 400 gold.
Susan's Quest - repeatable

Begins in the last room of the Swamp Mansion, past the Vines.
Talk to Susan to start the quest.
Kill 60 Tenbas - return to Susan.
If you're having trouble killing 60 Tenbas, head over to the Tenba room in Hall of Borg, 10 Tenbas spawn in there.
It's a good idea to keep the Tenba Bags that drop, you'll need 100 of them if you're going to complete the Ancient Wraith Quest.
Reward - 2,500 exp.
Susan runs around all over the map, there's no coordinates restricting her. So it might take a while to find her at times.
PM an admin if you need any help in finding her.
Factory Panic Quest - repeatable

Begins in the Factory Entrance - Control Centre - within Dizzy Desert.
Talk to the Co-Worker to start the quest.
Talk to the Co-Worker - again. He'll tell you that you need to shut down the 4 Generators.
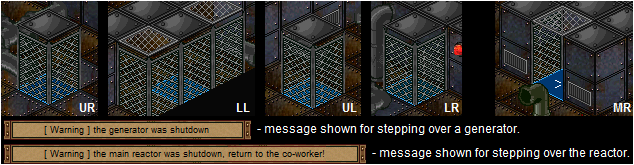
Shut down the Upper right Generator - step on the blue warp tile. The entrance into the Factory is behind the Co-Worker and Inventor.
By heading back to talk to the Co-worker, he'll tell you where the Generator is to shut down. I'll save you from going back and forth.
Otherwise just head on over to the next Generator.
Shut down the Lower left Generator - step on the blue warp tile.
Shut down the Upper left Generator - step on the blue warp tile.
Shut down the Lower right Generator - step on the blue warp tile, return to the Co-Worker.
Shut down the Main Reactor - go into the factory, head to the upper right corner to the cage with the Proto. Enter in through the open gate.
In there you can kill Proto one on one without the other Robots coming in. Otherwise continue down the stairs. By continuing this part of the quest you will not be able to go back into the cage unless you repeat the quest again up to this point.
Head down six flights of stairs until you reach a room with waterfalls. Step on the blue warp tile. Head back down all the stairs to the Co-Worker.
Reward - 340 exp.
Talk to the Co-Worker to start the quest.
Talk to the Co-Worker - again. He'll tell you that you need to shut down the 4 Generators.
Shut down the Upper right Generator - step on the blue warp tile. The entrance into the Factory is behind the Co-Worker and Inventor.
By heading back to talk to the Co-worker, he'll tell you where the Generator is to shut down. I'll save you from going back and forth.
Otherwise just head on over to the next Generator.
Shut down the Lower left Generator - step on the blue warp tile.
Shut down the Upper left Generator - step on the blue warp tile.
Shut down the Lower right Generator - step on the blue warp tile, return to the Co-Worker.
Shut down the Main Reactor - go into the factory, head to the upper right corner to the cage with the Proto. Enter in through the open gate.
In there you can kill Proto one on one without the other Robots coming in. Otherwise continue down the stairs. By continuing this part of the quest you will not be able to go back into the cage unless you repeat the quest again up to this point.
Head down six flights of stairs until you reach a room with waterfalls. Step on the blue warp tile. Head back down all the stairs to the Co-Worker.
Reward - 340 exp.
Summoner Quest - repeatable

Begins in the Summoner's house, in Forks - this quest is used to obtain the spell Dark Hand.
Talk to the Summoner to start the quest.
Bring the Summoner a Terror Potion - you'll be needing another item from Hitaru, so check below. Its price is 40 gold.
Bring the Summoner an Evil Potion. Its price is 25 gold.
Kill 20 Undeath - it's a good idea to keep the Dark Rags that drop from them since they're needed in the next part. Return to the Summoner.
Collect 20 Dark Rags - return to the Summoner.
By selecting 'Make me Summoner' your class will be changed to 'Summoner'. Head on over to the Forks Skill Master to learn Dark Hard.
Having Summoner as a class dramatically decreases all stats, so keeping it has a class isn't helpful in training.
Reward - class change to Summoner.
Pjedro's Son Quest - terminal

Begins in Pjedro's house, in the Malone Outlet - east from Aeven's exit.
Talk to Pjedro to start the quest.
Talk to Pjedro's Wife - her name is Merriad, she's outside walking around in the Malone Outlet, usually near the Piggies.
Talk to Pjedro - again.
Talk to Nena - in Anundo, which is past the Death Cave.
You can collect Scrolls of Anundo from the Chest in the Chest room, or buy them from players if you don't want to walk there.
Talk to the Guard - outside of the Death Cave, in the Swamp.
You may need to switch the quests when talking to the Guard, just click the two boxes up the top right of his dialogue box to do so. I've shown below.
Talk to the Elite Captain - he's in the Red Arena, in the Castle.
Talk to the Guard - in the Swamp again.
Enter the Haunted House - east of the Swamp.
Enter the Second floor of the HH.
Enter the Third floor of the HH.
Enter the Fourth floor of the HH.
Stand before the book - the book is in the centre of the room. You will receive a Scroll of Truth.
Give the Scroll of Truth to Ayla - after giving her the scroll you'll be teleported into the Woods of Despare.
Find the Bird Fortress - the Bird Fortress is where Pjedro's son is.
To get there you need to go Right one map, Down twice, Right three times, Down once and then Left. R D D R R R D L for simpler directions.
Talk to Pjedro's son - you'll be teleported back to Pjedro's house.
Talk to Pjedro.
Reward - 4,600 exp.

Monkey Island Quest - terminal

Begins in Aeven Port.
Talk to the Young Pirate to start the quest.
Select "Don't believe you" - in the Young Pirate's dialogue.
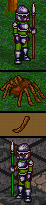
Talk to the Pirate Captain - he's on the ship near the Desert entrance.
Kill 3 Drunken Pirates - in Aeven Port. Return to the Pirate Captain.
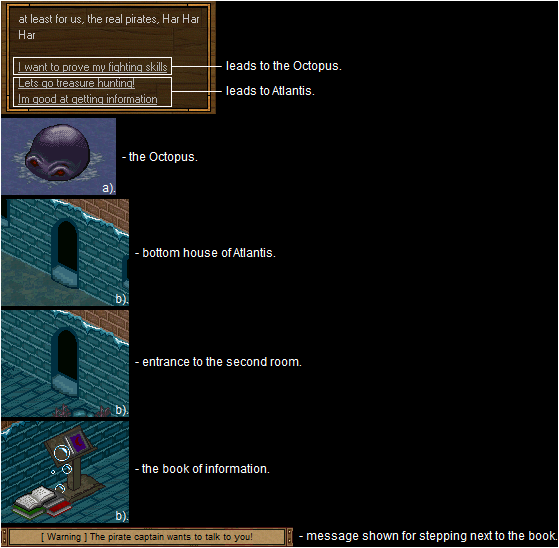
Select "I know about a treasure.." - in the Pirate Captain's dialogue. At the next part of the dialogue you'll be given a choice on how to continue the quest. You can choose to kill the Octopus or travel to Atlantis to collect information. Later on you will be needing to collect 10 Fish from Atlantis, so either way you'll be needing to head over there. If you accidentally click the wrong option you can click on the Pirate Captain and choose "Isn't there another way to prove it?" to change it over.
a). Kill the Octopus - inside the Bat Dungeon, return to the Pirate Captain.
b). Travel to Atlantis - Atlantis is within the Death Cave to the West. Just have to follow through the map with Flymen and Vyercils to get there.
Head into the house on the bottom of the map and enter into the next room up the top. Down the left side of the map you'll find a book, stand in front of it to reveal the secret. Return to the Pirate Captain.
Kill 30 Rats - it says kill them in Aeven Port, but you can still kill them elsewhere. Return to the Young Pirate.
When you talk to the Young Pirate he will test to see if you're a real pirate. The answers you will need to select in the dialogue are "Jolly Roger", "Double Share" and "Always Open".
Once you have answered them, the Young Pirate will send you to Monkey Island. If you want to return back to Aeven Port, just walk back onto the Ship.
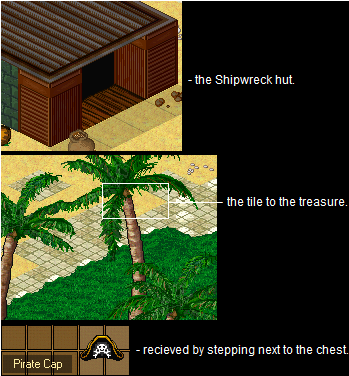
Find the Shipwreck Hut - the Shipwreck Hut is at the Upper right corner of the map. Talk to the Lost Pirate inside.
Bring the Lost Pirate 10 Fish - dropped from Fish, in Atlantis. To return back to Monkey Island, talk to the Young Pirate.
He will tell you a riddle to find where the treasure is. The entrance to where the treasure is located is on the left side of the island, there's a picture below showing where you need to go. Once in the hidden map, walk over to the chest to receive the first part of the reward.
Go back to the Pirate Captain - once you have received your gold and Cap from the chest, head back to the Ship to return to Aeven Port and talk to the Pirate Captain to complete the quest.
Reward - 1,600 gold, a Pirate Cap and 800 exp.
When in Atlantis, you can let your HP drain out, it will just stay at 1 HP but don't get hit by aggressive monsters, otherwise you'll die.
Talk to the Young Pirate to start the quest.
Select "Don't believe you" - in the Young Pirate's dialogue.
Talk to the Pirate Captain - he's on the ship near the Desert entrance.
Kill 3 Drunken Pirates - in Aeven Port. Return to the Pirate Captain.
Select "I know about a treasure.." - in the Pirate Captain's dialogue. At the next part of the dialogue you'll be given a choice on how to continue the quest. You can choose to kill the Octopus or travel to Atlantis to collect information. Later on you will be needing to collect 10 Fish from Atlantis, so either way you'll be needing to head over there. If you accidentally click the wrong option you can click on the Pirate Captain and choose "Isn't there another way to prove it?" to change it over.
a). Kill the Octopus - inside the Bat Dungeon, return to the Pirate Captain.
b). Travel to Atlantis - Atlantis is within the Death Cave to the West. Just have to follow through the map with Flymen and Vyercils to get there.
Head into the house on the bottom of the map and enter into the next room up the top. Down the left side of the map you'll find a book, stand in front of it to reveal the secret. Return to the Pirate Captain.
Kill 30 Rats - it says kill them in Aeven Port, but you can still kill them elsewhere. Return to the Young Pirate.
When you talk to the Young Pirate he will test to see if you're a real pirate. The answers you will need to select in the dialogue are "Jolly Roger", "Double Share" and "Always Open".
Once you have answered them, the Young Pirate will send you to Monkey Island. If you want to return back to Aeven Port, just walk back onto the Ship.
Find the Shipwreck Hut - the Shipwreck Hut is at the Upper right corner of the map. Talk to the Lost Pirate inside.
Bring the Lost Pirate 10 Fish - dropped from Fish, in Atlantis. To return back to Monkey Island, talk to the Young Pirate.
He will tell you a riddle to find where the treasure is. The entrance to where the treasure is located is on the left side of the island, there's a picture below showing where you need to go. Once in the hidden map, walk over to the chest to receive the first part of the reward.
Go back to the Pirate Captain - once you have received your gold and Cap from the chest, head back to the Ship to return to Aeven Port and talk to the Pirate Captain to complete the quest.
Reward - 1,600 gold, a Pirate Cap and 800 exp.
When in Atlantis, you can let your HP drain out, it will just stay at 1 HP but don't get hit by aggressive monsters, otherwise you'll die.
Pirate Quest - terminal

Begins in Aeven Port.
Talk to the Old Pirate to start the quest.
Select "Sure, let's drink" - in the Old Pirate's dialogue.
Bring the Old Pirate a Big Fairy Soda - once you have collected one, the quest progress changes and you need to collect 20.
Bring the Old Pirate 20 Big Fairy Sodas - they are dropped by Drunken Pirates, as well as spawned from chests in Aeven Pub and can be bought by the Bartender for 100 gold each.
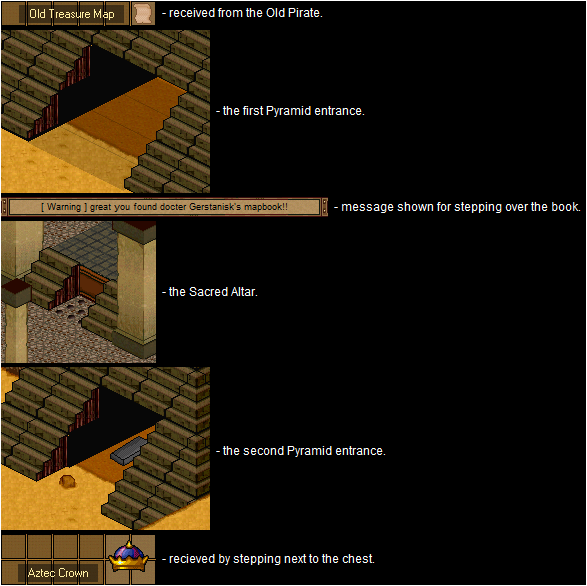
You will receive an Old Treasure Map after giving the Old Pirate the 20 Big Fairy Sodas.
Talk to the Pirate Captain - he's on the ship near the Desert entrance. Click "I got this old map.." and then "I stole it from the King!"
By clicking ''Aye, Aye Captain'' you'll be teleported out to sea on the ship.
Talk to the Pirate Captain - inside the ship's cabin.
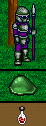
On the ship you'll need to kill 50 Imperial Sea Guards, click ''Aye, Aye Captain'' to begin.
Kill 50 Imperial Sea Guards - take the stairs down to access the ship's deck. Return to the Pirate Captain.
Once you have spoken to the Pirate Captain, he will send you to Vulture Island. You can always return back to mainland to continue the quest if you have something to do, just do that by walking through the ship's door and talk to the Pirate Captain to then return back there.
It's a good idea to get yourself some Health Potions before continuing the next part of the quest because you'll be needing to step over a lot of spikes. They can be bought from Nomad in the Potion Shop in the Desert.
Find the Pyramid entrance - step off the ship and head towards the right of the map until you come across a Pyramid, don't worry about entering the cave to the left, it just takes you to the other side of the Island. While inside the Pyramid your HP is drained, it's a good idea to remove anything from your Paper-doll that is giving you extra Constitution, this will decrease the damage of the drain and spikes. Have your Health Potions ready and enter the Pyramid.
Once inside the Pyramid, go Up one map, Left once, Down once, Left twice, Up once and then Right. U L D L D L U R for simpler directions.
The seventh room you enter has spikes that elevate up and down, step on the spikes when they are up to take no damage.
The last room is a safe, talk to the Archeologist. Don't worry about your HP draining out while talking to him, you won't die unless you take damage from something, otherwise it will just sit at 1 HP.
Find Gerstanisk's book - you're going to have to return back to where you came from. Remember to heal up before you walk back out. To go backwards go Left one map, Down once, Right twice, Up once and then Right. Going down will take you back to the entrance but from here you need to continue Right twice, Down twice, Right twice, Up once - remember this room, you will need to return back to this Altar in the next part of the quest - Up twice, Left twice, Down once, Left once, Up once and then Left into the Lair of King Wurms. So for simpler directions from the Archeologist's room, L D R R U R R R
D D R R U U U L L D L U L.
Inside the Lair of King Wurms, head to the upper left corner of the map and step on top of the book to find Gerstanisk's Map-book. You don't get it in your inventory.
Head back to the Archeologist. The directions from the Lair is Right one map, Down once, Right once, Up once, Right twice, Down three times, Left twice, Up twice, Left three times, Down once, Left twice, Up once and then Right. R D R U R R D D D L L U U L L L D L L U R for simpler directions.
Talk to the Archeologist - select "I got this old map.." in the dialogue.
Find the Sacred Altar - this is the room I mentioned before. To get there go Left one map, Down once, Right twice, Up once, Right three times, Down twice, Right twice and then Up. L D R R U R R R D D R R U for simpler directions.
Go up and step in the space in the Altar, there will be an earthquake. Return to the Archeologist. To go back go Down one map, Left twice, Up twice, Left three times, Down once, Left Twice, Up once and then Right. D L L U U L L L D L L U R for simpler directions.
Talk to the Archeologist - he will tell you that the entrance to the second Pyramid is now open. The second Pyramid is outside behind the first, so to get there you need to go Left one map, Down once, Right twice, Up once, Right once and then Down twice to exit. L D R R U R D D for simpler
directions.
Go around the right side of the Pyramid and up the map until you see the second Pyramid, then enter.
Once inside the second Pyramid, go Left one up, Up twice and then Down. L U U D for simpler directions.
Research the Tombs - once you have followed those directions you'll end up in the Treasure Room. Walk on over to the chest and you will receive the Aztec Crown. You can't equip the Aztec Crown.
To exit the second Pyramid from the room with the chest, go up one map and then down. U D for simpler directions.
Trade the Aztec Crown - so here you have two choices on finishing the quest. You can either return to the Archeologist or return to the Pirate Captain for rewards, but each give a different reward. To collect the reward from the Pirate Captain you have to leave Vulture Island from the ship and talk to him in Aeven Port.
Reward by the Archeologist - 6,200 exp.
Reward by the Pirate Captain - 4,200 exp and 1,200 gold.
Talk to the Old Pirate to start the quest.
Select "Sure, let's drink" - in the Old Pirate's dialogue.
Bring the Old Pirate a Big Fairy Soda - once you have collected one, the quest progress changes and you need to collect 20.
Bring the Old Pirate 20 Big Fairy Sodas - they are dropped by Drunken Pirates, as well as spawned from chests in Aeven Pub and can be bought by the Bartender for 100 gold each.
You will receive an Old Treasure Map after giving the Old Pirate the 20 Big Fairy Sodas.
Talk to the Pirate Captain - he's on the ship near the Desert entrance. Click "I got this old map.." and then "I stole it from the King!"
By clicking ''Aye, Aye Captain'' you'll be teleported out to sea on the ship.
Talk to the Pirate Captain - inside the ship's cabin.
On the ship you'll need to kill 50 Imperial Sea Guards, click ''Aye, Aye Captain'' to begin.
Kill 50 Imperial Sea Guards - take the stairs down to access the ship's deck. Return to the Pirate Captain.
Once you have spoken to the Pirate Captain, he will send you to Vulture Island. You can always return back to mainland to continue the quest if you have something to do, just do that by walking through the ship's door and talk to the Pirate Captain to then return back there.
It's a good idea to get yourself some Health Potions before continuing the next part of the quest because you'll be needing to step over a lot of spikes. They can be bought from Nomad in the Potion Shop in the Desert.
Find the Pyramid entrance - step off the ship and head towards the right of the map until you come across a Pyramid, don't worry about entering the cave to the left, it just takes you to the other side of the Island. While inside the Pyramid your HP is drained, it's a good idea to remove anything from your Paper-doll that is giving you extra Constitution, this will decrease the damage of the drain and spikes. Have your Health Potions ready and enter the Pyramid.
Once inside the Pyramid, go Up one map, Left once, Down once, Left twice, Up once and then Right. U L D L D L U R for simpler directions.
The seventh room you enter has spikes that elevate up and down, step on the spikes when they are up to take no damage.
The last room is a safe, talk to the Archeologist. Don't worry about your HP draining out while talking to him, you won't die unless you take damage from something, otherwise it will just sit at 1 HP.
Find Gerstanisk's book - you're going to have to return back to where you came from. Remember to heal up before you walk back out. To go backwards go Left one map, Down once, Right twice, Up once and then Right. Going down will take you back to the entrance but from here you need to continue Right twice, Down twice, Right twice, Up once - remember this room, you will need to return back to this Altar in the next part of the quest - Up twice, Left twice, Down once, Left once, Up once and then Left into the Lair of King Wurms. So for simpler directions from the Archeologist's room, L D R R U R R R
D D R R U U U L L D L U L.
Inside the Lair of King Wurms, head to the upper left corner of the map and step on top of the book to find Gerstanisk's Map-book. You don't get it in your inventory.
Head back to the Archeologist. The directions from the Lair is Right one map, Down once, Right once, Up once, Right twice, Down three times, Left twice, Up twice, Left three times, Down once, Left twice, Up once and then Right. R D R U R R D D D L L U U L L L D L L U R for simpler directions.
Talk to the Archeologist - select "I got this old map.." in the dialogue.
Find the Sacred Altar - this is the room I mentioned before. To get there go Left one map, Down once, Right twice, Up once, Right three times, Down twice, Right twice and then Up. L D R R U R R R D D R R U for simpler directions.
Go up and step in the space in the Altar, there will be an earthquake. Return to the Archeologist. To go back go Down one map, Left twice, Up twice, Left three times, Down once, Left Twice, Up once and then Right. D L L U U L L L D L L U R for simpler directions.
Talk to the Archeologist - he will tell you that the entrance to the second Pyramid is now open. The second Pyramid is outside behind the first, so to get there you need to go Left one map, Down once, Right twice, Up once, Right once and then Down twice to exit. L D R R U R D D for simpler
directions.
Go around the right side of the Pyramid and up the map until you see the second Pyramid, then enter.
Once inside the second Pyramid, go Left one up, Up twice and then Down. L U U D for simpler directions.
Research the Tombs - once you have followed those directions you'll end up in the Treasure Room. Walk on over to the chest and you will receive the Aztec Crown. You can't equip the Aztec Crown.
To exit the second Pyramid from the room with the chest, go up one map and then down. U D for simpler directions.
Trade the Aztec Crown - so here you have two choices on finishing the quest. You can either return to the Archeologist or return to the Pirate Captain for rewards, but each give a different reward. To collect the reward from the Pirate Captain you have to leave Vulture Island from the ship and talk to him in Aeven Port.
Reward by the Archeologist - 6,200 exp.
Reward by the Pirate Captain - 4,200 exp and 1,200 gold.
Truth Quest - terminal

Begins in the centre of the Swamp, past the Aeven Port - enter down the stairs into the underground cave.
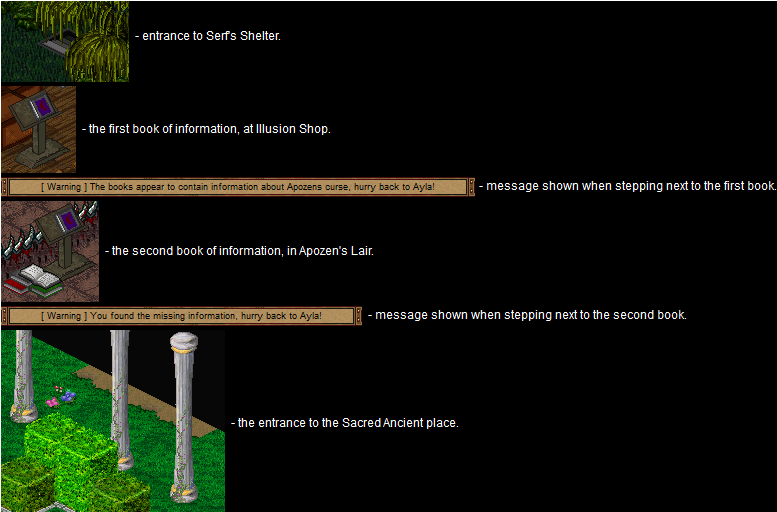
Talk to Serf to start the quest.
Kill 25 Swamp Monsters - they are found outside in the Swamp, return to Serf.
Find Gullio - he is inside the Skeleton Crypt, return to Serf.
Bring Serf 10 Herbs - bought from Shop Bob in Aeven Grocery, their price are 120 gold.
Collect 10 Mushrooms - dropped from Mushrooms, found on the map before Centaur, return to Serf.
Collect 14 Blob Slimes - dropped from Blobs, found outside of the Castle and near Malone Outlet, return to Serf.
Collect 5 Gnome Dolls - dropped from Gnomes and Gnome Riders, in Dizzy Desert, return to Serf.
Talk to Ayla - in the Witch's house.
Find the book of Apozen - travel to Estaq Stronghold and enter the Illusion Shop. Stand in front of the book to collect the information, return to Ayla.
She will tell you that you need to find another book in Apozen's Lair, so it might be a good idea to get some Health Potions to get past the Hell Guardians.
Find the book inside Apozen's Lair - stand in front of the book to collect the information, return to Ayla.
Bring Ayla 5 Ancient Scrolls - dropped from Barbarians and also bought from the Barbarian Captain, both are found in Estaq Stronghold. Their price are 1,000g.
Once you have given Ayla the scrolls that are needed, she will leave one for you. Use it to teleport yourself to Ancient.
Find the Sacred Ancient place - from the entrance to Ancient, you need to go Up one map, Right once and then head to the top right corner of the map. There you will see columns and a dirt patch entrance, walk through the entrance. U R and head up towards the dirt patch, for simpler directions.
On this map are Ayla, Serf, Gullio and Hitaru.
Talk to Ayla - after you click that are ready to start the Ritual, your screen will shake as if there is an earthquake, it will pass after a couple seconds.
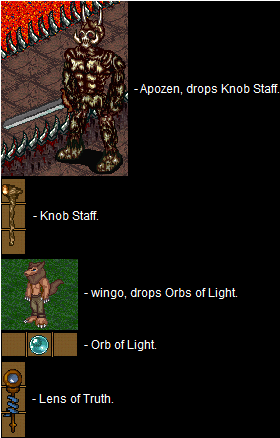
Talk to Serf - he is back at the Swamp. When you talk to him you will have two choices on finishing the quest. You can either earn a reward of experience or craft a Lens of Truth with the same amount of experience given. If you're wanting to craft the Lens of Truth you will need to collect a Knob Staff and 10 Orbs of Light.
Reward - 5,500 exp or 5,500 exp and Lens of Truth.
There's a couple glitches in this quest, you get to keep the 10 Herbs after talking to Serf as well as 4 of the Blob Slimes.
Also if you're wanting to craft a Lens of Truth, it's a good idea at the part of the quest when needing to read the book in Apozen's Lair, to try and get a Knob Staff drop from Apozen, that will save you from going back and forth.
Lens of Truth can only be achieved through the Truth Quest, it isn't dropped, bought or crafted elsewhere, but can be bought from other players.
Talk to Serf to start the quest.
Kill 25 Swamp Monsters - they are found outside in the Swamp, return to Serf.
Find Gullio - he is inside the Skeleton Crypt, return to Serf.
Bring Serf 10 Herbs - bought from Shop Bob in Aeven Grocery, their price are 120 gold.
Collect 10 Mushrooms - dropped from Mushrooms, found on the map before Centaur, return to Serf.
Collect 14 Blob Slimes - dropped from Blobs, found outside of the Castle and near Malone Outlet, return to Serf.
Collect 5 Gnome Dolls - dropped from Gnomes and Gnome Riders, in Dizzy Desert, return to Serf.
Talk to Ayla - in the Witch's house.
Find the book of Apozen - travel to Estaq Stronghold and enter the Illusion Shop. Stand in front of the book to collect the information, return to Ayla.
She will tell you that you need to find another book in Apozen's Lair, so it might be a good idea to get some Health Potions to get past the Hell Guardians.
Find the book inside Apozen's Lair - stand in front of the book to collect the information, return to Ayla.
Bring Ayla 5 Ancient Scrolls - dropped from Barbarians and also bought from the Barbarian Captain, both are found in Estaq Stronghold. Their price are 1,000g.
Once you have given Ayla the scrolls that are needed, she will leave one for you. Use it to teleport yourself to Ancient.
Find the Sacred Ancient place - from the entrance to Ancient, you need to go Up one map, Right once and then head to the top right corner of the map. There you will see columns and a dirt patch entrance, walk through the entrance. U R and head up towards the dirt patch, for simpler directions.
On this map are Ayla, Serf, Gullio and Hitaru.
Talk to Ayla - after you click that are ready to start the Ritual, your screen will shake as if there is an earthquake, it will pass after a couple seconds.
Talk to Serf - he is back at the Swamp. When you talk to him you will have two choices on finishing the quest. You can either earn a reward of experience or craft a Lens of Truth with the same amount of experience given. If you're wanting to craft the Lens of Truth you will need to collect a Knob Staff and 10 Orbs of Light.
Reward - 5,500 exp or 5,500 exp and Lens of Truth.
There's a couple glitches in this quest, you get to keep the 10 Herbs after talking to Serf as well as 4 of the Blob Slimes.
Also if you're wanting to craft a Lens of Truth, it's a good idea at the part of the quest when needing to read the book in Apozen's Lair, to try and get a Knob Staff drop from Apozen, that will save you from going back and forth.
Lens of Truth can only be achieved through the Truth Quest, it isn't dropped, bought or crafted elsewhere, but can be bought from other players.
Ancient Wraith Quest - terminal

Begins on the Seventh floor of the Haunted House.
Talk to the Wraith Guardian to start the quest.
Kill the Reaper - in the Death Cave. Return to the Wraith Guardian.
Kill the Ninja Leader - in Anundo. Return to the Wraith Guardian.
Kill the Octopus - inside the Bat Dungeon. Return to the Wraith Guardian.
Kill Apozen - in hell. Return to the Wraith Guardian.
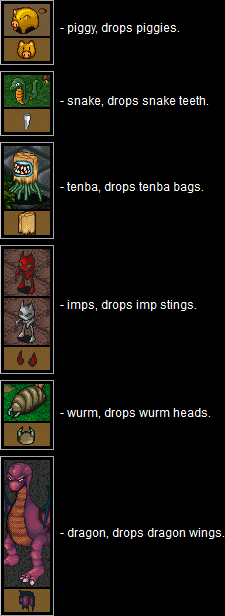
Collect 100 Piggies - return to the Wraith Guardian.
Collect 100 Snake Teeth - return to the Wraith Guardian.
Collect 100 Tenba Bags - return to the Wraith Guardian.
Collect 100 Imp Stings - return to the Wraith Guardian.
Collect 100 Wurm Heads - return to the Wraith Guardian.
Collect 10 Dragon Wings - you get to keep the Dragon Wings, so don't worry about having to lose them. Return to the Wraith Guardian.
PK 500 Humans - having to kill 500 players would take literally forever, instead go and get your 500 Small Health Potions. Using one will count as one player kill. Return to the Wraith Guardian.
Using the last Small Health Potion will also cause a small global earthquake.
Reward - 10,000 exp and the Wraith Key.
The Wraith Key is used to enter the Ancient Wraith Room.
Talk to the Wraith Guardian to start the quest.
Kill the Reaper - in the Death Cave. Return to the Wraith Guardian.
Kill the Ninja Leader - in Anundo. Return to the Wraith Guardian.
Kill the Octopus - inside the Bat Dungeon. Return to the Wraith Guardian.
Kill Apozen - in hell. Return to the Wraith Guardian.
Collect 100 Piggies - return to the Wraith Guardian.
Collect 100 Snake Teeth - return to the Wraith Guardian.
Collect 100 Tenba Bags - return to the Wraith Guardian.
Collect 100 Imp Stings - return to the Wraith Guardian.
Collect 100 Wurm Heads - return to the Wraith Guardian.
Collect 10 Dragon Wings - you get to keep the Dragon Wings, so don't worry about having to lose them. Return to the Wraith Guardian.
PK 500 Humans - having to kill 500 players would take literally forever, instead go and get your 500 Small Health Potions. Using one will count as one player kill. Return to the Wraith Guardian.
Using the last Small Health Potion will also cause a small global earthquake.
Reward - 10,000 exp and the Wraith Key.
The Wraith Key is used to enter the Ancient Wraith Room.